How to Set Up a Grow Tent and Grow Lights

If you’re wondering how to set up a grow tent with grow lights, you’ve landed in the right place. Setting up your first grow environment can seem daunting, but honestly, it doesn’t have to be. If you equip yourself with the correct knowledge first, and get educated. Here’s a quick beginners guide to get you heading in the right direction.
We’re going to talk you through how to set up a 1.2m x 1.2m x 2m grow tent with grow lights (600W) and a comparable ventilation kit. This basic set up also includes, an environmental air mover and a temperature and humidity gauge. We’ll cover what you need, why you need it, and how to set up your grow tent with grow lights.
Considerations for Your Grow Tent and Grow Lights Setup
Firstly you need to ask yourself a few questions. Where are you going to put your grow tent with grow lights? Do you have space in your home to have an indoor garden? Attics and basements are popular options to consider. indoor gardening equipment is designed to run quietly, so as not to disturb your everyday living but inevitably, there will be a level of humming or buzzing from fans, filters, and ducting at some point! Solid floors are preferable, carpeted floors are a no-no due to risk of leakages, dampness, and bugs. Mould and pests can thrive within the fibres of a damp carpet, no good for your plants, your home, or your health!
Temperature is essential for the proper growth and development of your plants. Obviously you can manipulate the environment to an extent but if you put your grow tent in a damp basement, with no heating, in the middle of winter then you are going to be in trouble! You ideally want somewhere dry, with access to natural airflow and ventilation, that does not get too hot nor too cold. This is another reason why attics are popular, although a hot attic in the middle of summer can cause you problems too, so always take the season that you are growing in, into consideration as well. Ideally you need an environment which has the possibility of having an out-take and an in-take from a fresh outdoor source.
Once you have decided on where you are going to put your tent it is a good idea to familiarise yourself with the equipment that you will be using.
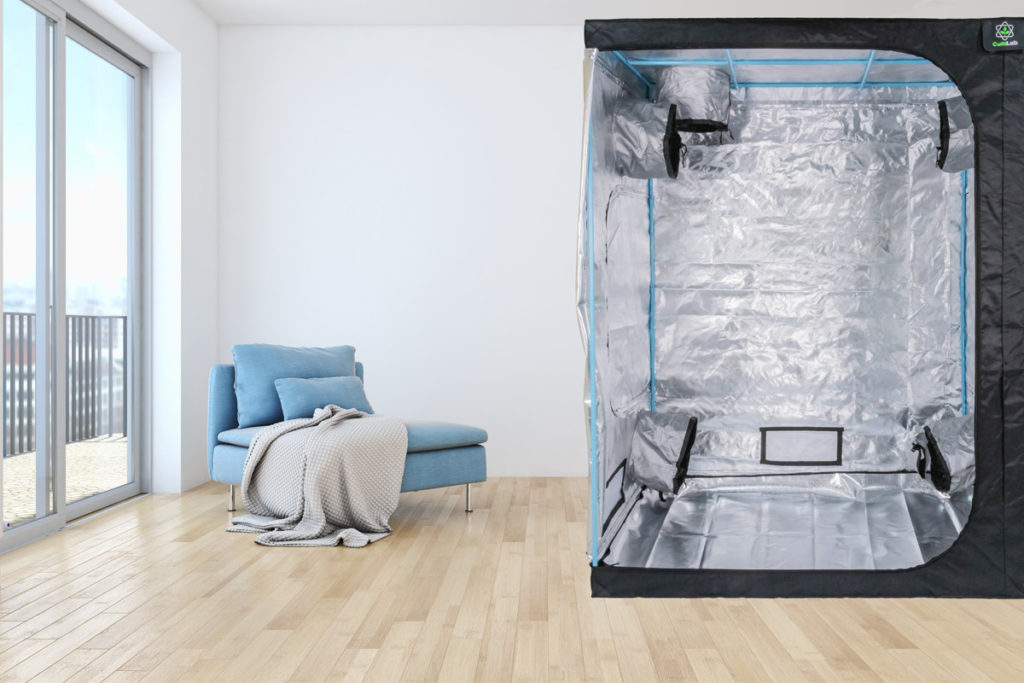
Grow Tents
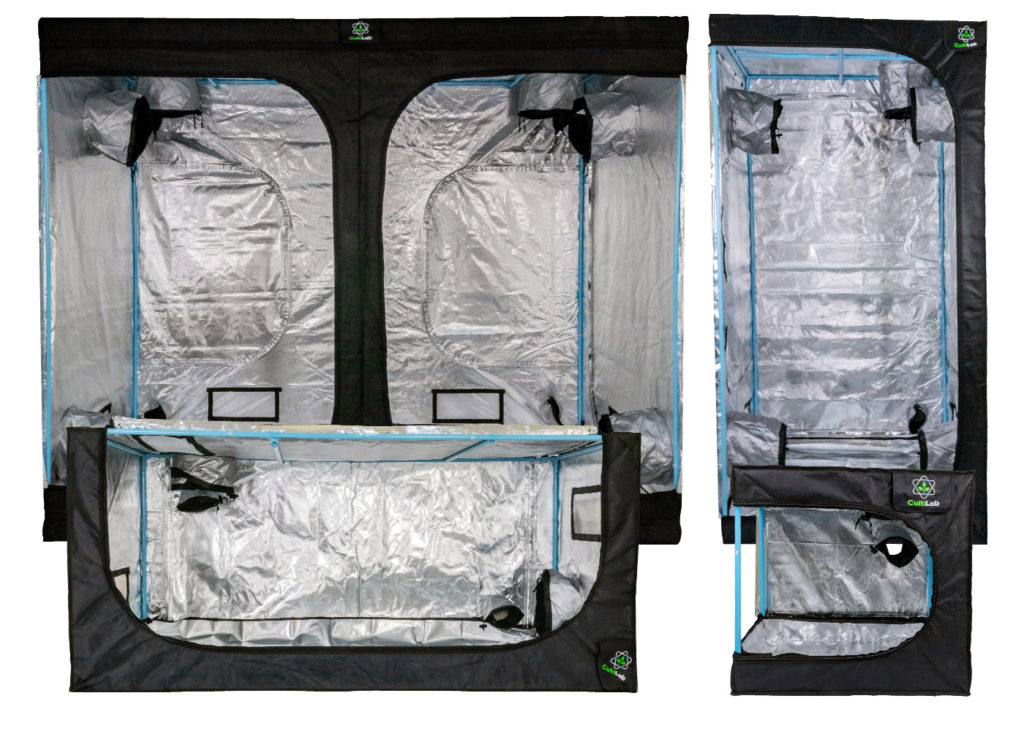
Grow tents come in all sizes and shapes, from mini tents, specifically for propagation, to colossal ones for large flowering crops. When choosing a grow tent, the bottom line is… you get what you pay for. All tents have a reflective lining that works to reflect any light inward, back towards your plants. The only difference being that the reflective lining comes in 2 colour options, silver or white, both of which are equally effective.
The tent is its own mini environment and when it is sealed up, no light, odours, or air can get in or out unless you let it. Tents are a popular choice as they are so convenient, easy to put up, dismantle, transport and store, providing everything that the grower needs.
Ventilation Kit- Fan, Filter, Ducting and Clamps
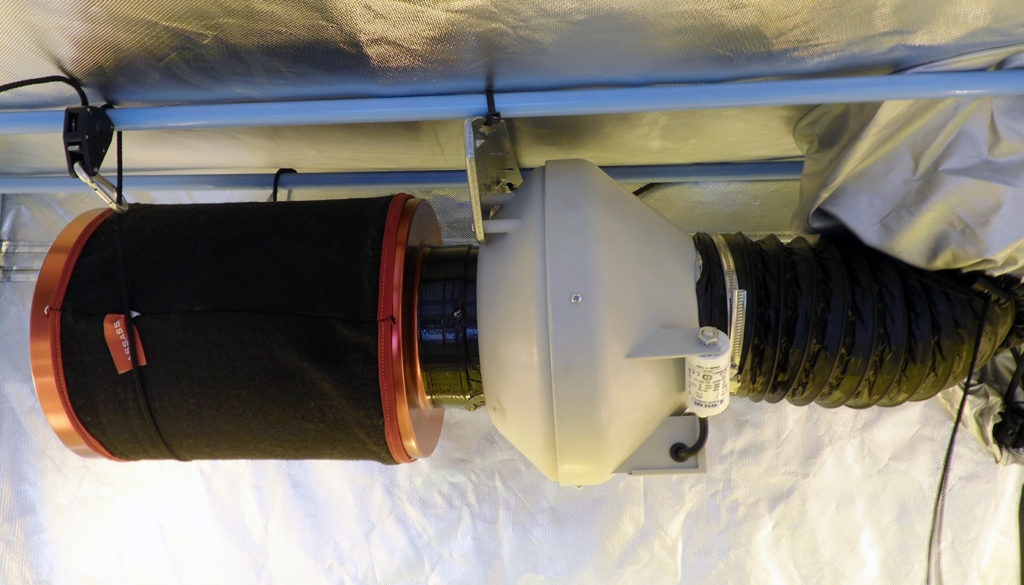
Ventilation via an extraction fan is of upmost importance in your grow tent with grow lights. It is vital, to optimise fresh airflow within your grow tent. When growing indoors, optimising the environment is key. A good environment leads to a strong growth and high yields.
Carbon FIlter
The size of your extraction fan and carbon filter should always match. Filters work by pulling air from within your tent, through a bed of carbon (removing bacteria and odour) and then exhausting the “scrubbed” air into an outside environment, via a ducting system.
Ducting
In regards to ducting, Acoustic ducting is very popular as it reduces any excess noise that the ventilation fan may make. It is comprised of a dual layer of standard ducting with fibreglass sandwiched in the middle. Clamps hold the ducting, the fan and the filter in place, tighten them up firmly as this will make for a more efficient system.
Provide Clean Fresh Air For The Best Results
Remember that is always good practice to provide your indoor growing environment with a fresh, clean, incoming air source. It is important that the amount of air entering your environment through the in-take fan should always be less than the amount leaving through the out-take fan – maintaining negative pressure.
Lighting Kit
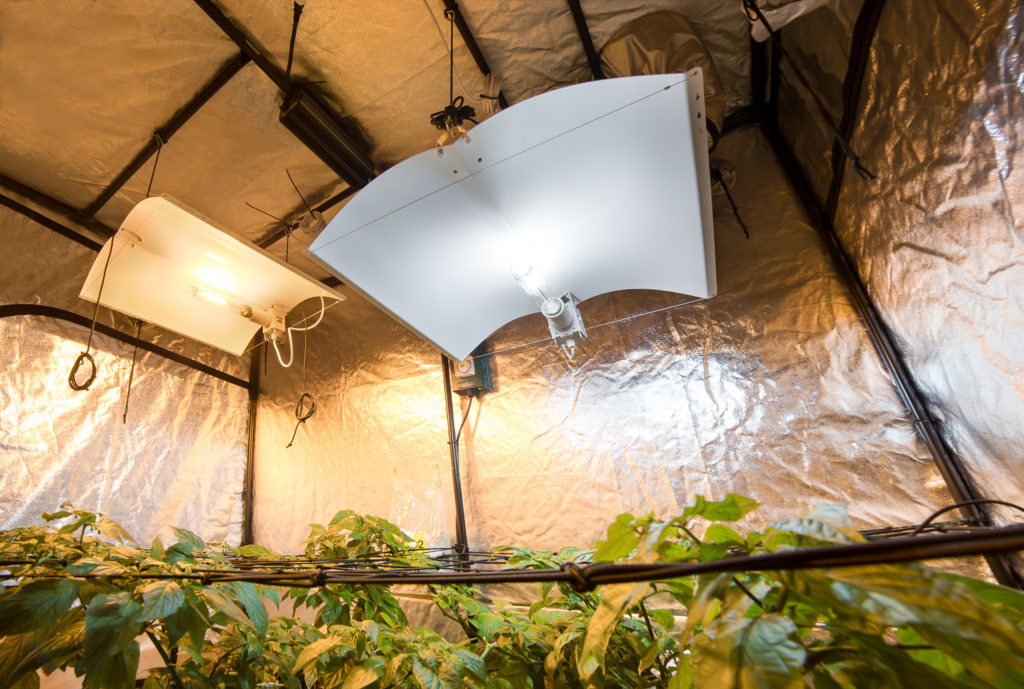
The lighting kit (broken down into 3 simple sections below) is the “set up” that will provide all the light within your growing environment. We are looking at a 600W light kit.
1 – Ballast

What’s a ballast? you may ask. Well simply put, a ballast regulates the current to the lamps and provides them with sufficient voltage to start up. If you didn’t use a ballast, the horticultural lamps would just keep drawing power until they overloaded and blew a fuse.
There are 2 main types of ballast. 1- a magnetic ballast. 2- a digital ballast. Digital ballasts run cooler, truer to wattage, quieter, and use less energy than magnetic ballasts. Most 600W digital ballasts are dimmable which means the power can be down turned to lower wattages. These lower wattages are usually 250W and 400W. This accuracy is great for your plants. Most digital ballasts also have a 10% “boost” feature, which your plants will love in the last few weeks of Flower.
2 – Reflectors
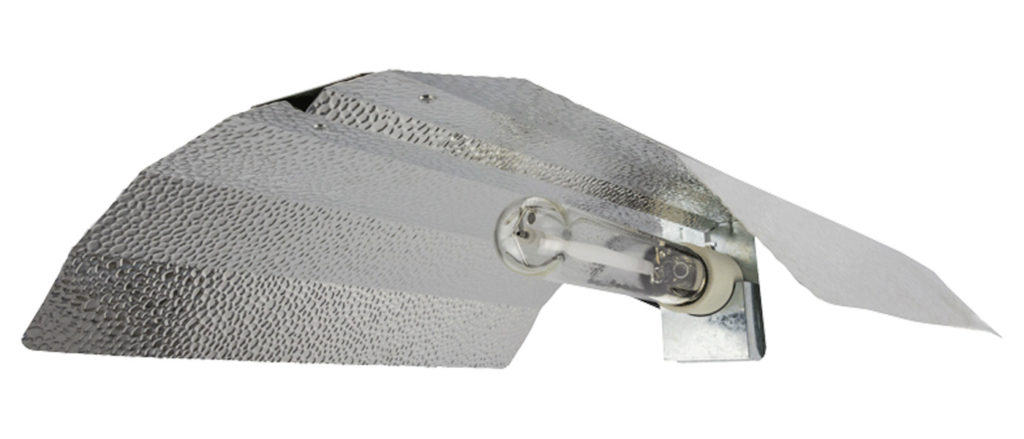
Grow tent and grow lights rely on grow light reflectors to direct the bulb’s light to where you want it; on to your plants. There are many styles available, but the Euro reflector is a popular, effective and good value choice that will do everything that you need it to. It has a highly reflective dimpled, hammer tone finish and maximises the spread of light in a very cost-effective way.
3 – Lamps
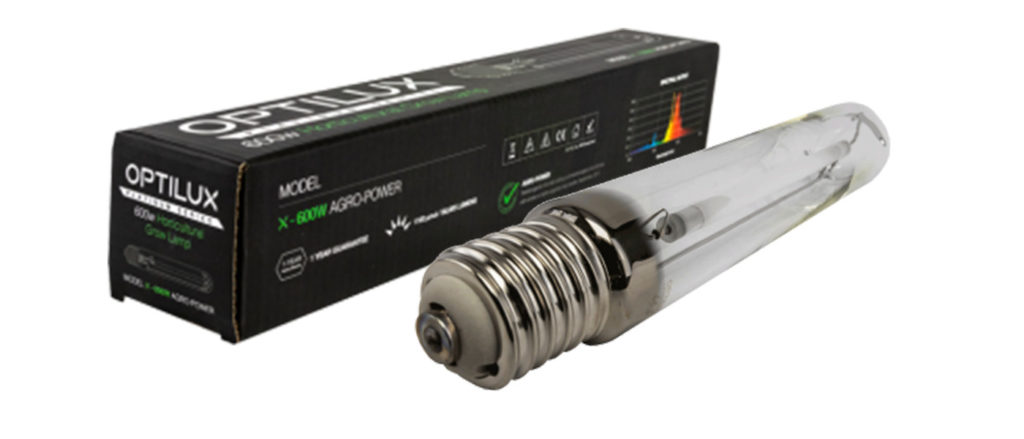
Your grow tent and grow lights needs a grow lamp. A popular choice is an Optilux 600W dual spectrum HPS. This lamp is ‘dual’ in that it emits a broad spectrum of light which includes both red spectrum light (perfect for Flowering) and blue spectrum light (perfect for Veg), which makes it suitable for use from Veg and all the way through Flower, eliminating the need for another bulb. It’s a great all-round lamp which is very commonly used for indoor gardening.
Contactor and Timer
A Contactor is an electrically controlled switch that spreads the electrical discharge of any equipment that is plugged into it, reducing the chances of the main fuse blowing when the initial strike up of the lamp/ballast occurs. Kill two birds with one stone here and buy one with a built-in timer, as they are extremely accurate and useful for turning your lights and fans on and off as and when you need them to.
Clip-on Oscillating fan
Oscillating fans move air around the growing environment and help keep temperatures even across the whole growing space. They also take gasses released from the leaves away from the plant, and move carbon dioxide and oxygen towards the plant for photosynthesis. As the fan oscillates it will also gently “shudder” the plants. This will help to increase the plants over all strength and rigidity.
Ratchet Hangers
These will allow you to hang all your equipment in your tent. They also let you adjust the distance between your plants and the lights when needed, as it is essential that the plant receives the maximum amount of lumen and par available from the bulb. Ratchet hangers are relatively cheap and make the setting up (and adjusting) of your growing environment that much easier.
Temperature Gauge and Hygrometer
Monitoring humidity and temperature levels throughout your Grow is important. Remember – a good environment leads to strong plants and a good yield. A digital “all in one” is perfect to give you accurate results and has lots of handy feature such as memory recall and a max/min temperature setting. This will help you dial in a better growing environment, best suited to the ideal conditions that your plants will require.
Right, so now you have an idea of everything you need, let’s look at what to do with it? First things first let’s start with the grow tent…
Grow Tent Set-up.
Firstly, get your instructions out! Don’t worry if you normally break out in a cold sweat at the sight of flat pack furniture! Tents are quite simple to assemble and shouldn’t cause you too many problems.
Garden tip: Lay out all the poles first and make sure that they are all in the position that they should be. It’s very common for people to throw the bars together however they think looks right, only to find out in the final stages of assembly, that the outer canopy will not fit over a corner by less than an inch!!
Over-stretching normally leads to either the canopy ripping and or a zip popping off. If the bars are set up correctly then the canopy should be a comfortable, taught fit. Another top tip when putting the canopy on, is to first unzip everything completely. This will give you a much better chance of getting it on right first time.
Grow Tent and Grow Lights Set-up
Essentially your light comes in three parts. To avoid confusion, It’s best to run through the separate elements one by one and get them in the correct position, and when all that’s done we can connect them all together. Let’s start outside the tent with the ballast.
Unboxing the Grow Lights
Unbox your ballast, if it’s a digital ballast you will need to untie the loose cable and firmly plug it into the ballast, this is the power cable. One end goes into the ballast and the other will go into the contactor, which in turn will be plunged into the main power supply. However, we are not plugging anything in just yet, so have your ballast where you want it as well as the contactor. The other cable coming out of the ballast will be heading into your light shade.
Reflector
Next is the reflector. Using the ratchet hangers hang your shade in the middle of your growing environment. It can be adjusted later.
Now it is time to plug things in. Firstly the lamp needs to be connected to the shade. Gently but firmly screw the bulb into the shade, covering your hand with a cloth to prevent fingerprints or greasy residues from getting on the lamp and affecting performance.
Now take the lead from your shade, pass it through one of the higher portals of your tent and plug it into your ballast cable.
The ballast now plugs into the contactor. Remember that the contactor and ballast should be outside of the tent. Keep them somewhere safe, dry and out of the way where they can’t be disturbed, covered up or trip someone over. Ideally hang it on a wall.
Set the timer on the contactor to your lights “on and off” times. Finally plug the contactor into your main power socket and check that the light comes on. By twisting the timer on the contactor you can fast forward time to check that it does turn on and off as needed. Please note, that every time a horticultural lamp is ignited (turned on) it needs to be left to cool down for at least 15mins every time. Yes that’s every time! Even if you just flick it on for a second, you must leave it to cool down. After everything is checked and left to cool down and the timer is reset to the correct position the contactor plug can be turned of at the mains ready for the next step.
Grow Tent and Grow Lights Ventilation Setup
The ventilation equipment comes in 3 main components:
- Filter
- Fan
- Ducting
You will also need duct clamps to connect it all together. Ventilation equipment is mostly contained within the tent.
Fan and Filter
Firstly the fan needs to be connected to the filter. Some filter and fan flanges are compatible and will connect easterly with a single duct clamp to secure together. Others will not, with these a small section from the main ducting pipe will need to be removed and used a short connecting piece between filter and fan, using duct clamps to secure. It’s important to remember at this point that the fan needs to be the right way around. The fan needs to pull through the filter direction and push in the other.
Ducting
Next the main ducting should be attached to the other side of the fan, again using a ducting clamp. Now that we have the equipment put together it need to go in the growing environment.
The filter and fan should be securely suspended with ratchet hangers from the horizontal top bars near to the back wall of the tent, near the top but not touching it the side walls nor the ceiling of the grow tent. The ducting section should then lead to an outside environment. The plug cable from the fan should then be plugged into a power outlet for 24/7 operation.
Top tip here is Clamp everything together really tightly to allow the filter to maximise how much air it can scrub and remove. This will also prevent any noise or odour escaping.
If you have a in take fan this should be done in the same way, but the other way round to bring air in.
Final touches for your grow tent and grow lights set up
You’re nearly there. Just the final touches for your grow tent and grow lights to go.
The oscillating fan should be clipped onto one of the vertical tent poles at the back of the tent, adjust the position once the plants are in the tent so that the fan is level with the plants canopy. Pass the power lead through a portal in the tent and plug it into the contactor.
The temperature gauge and hygrometer can be hung from one of the ceiling pole in the tent. These should be at the canopy of the plant, so having them on ratchet hangers is perfect for moving them up and down as and when needed.
Soon as all the above is complete it’s time to plug in the contactor to get everything working together.
Ready for the next grow tent and grow lights step… plants
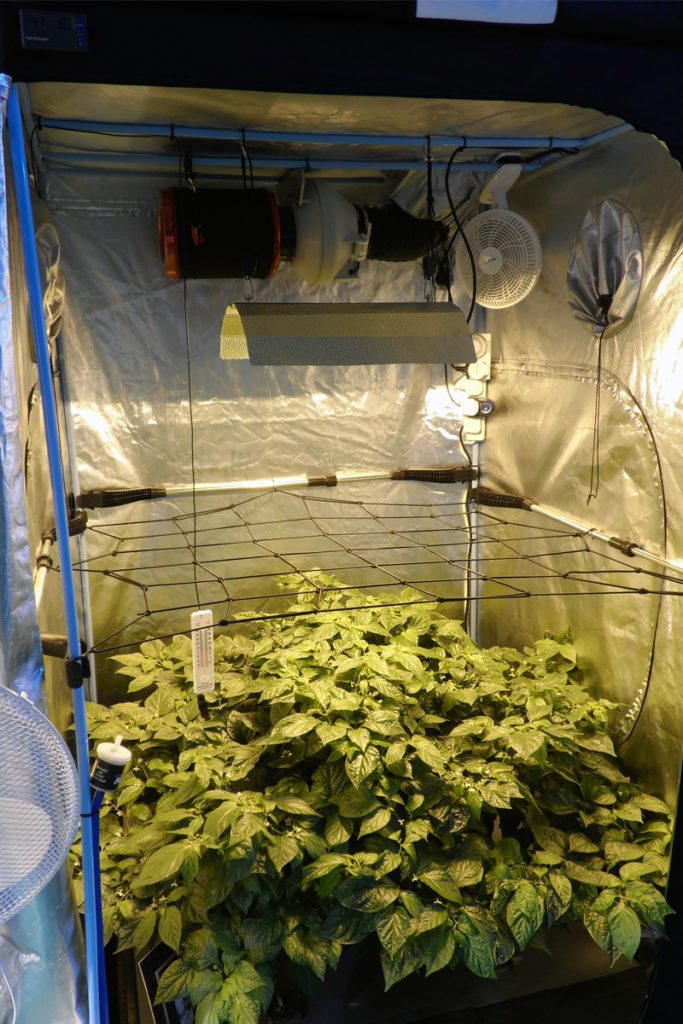
That’s it, your tent is now ready for your plants. We can’t lie here and pretend that, all the hard work is now over, because it most definitely is not! In fact it’s only just begun. Any experienced Grower will tell you that you only learn through trial and error, so take this time to monitor your plants closely, experimenting, altering and adjusting as you go. Try not to put too much pressure on yourself, learn from your mistakes, ask questions and take any advice you can get. Knowledge is power after all. By doing this you will quickly learn how to read your plants, environment and the rewards will grow as your experience does.


