How to Take A Cutting From a Plant for Propagation
The spring is a great time for all gardeners. It’s the time of year we put in all the leg work. This prepares our plants and gives them the best start in life for great results. It’s also the perfect time to learn how to take a cutting from a plant to propagate.
Starting your seeds and cuttings early, will give your cuttings (and seeds) time to create strong root systems. More roots means your plants and cuttings have improved opportunities to access the nutrients and water you’ll give them. It’ll also help to promote stronger vegetative and flowering stages with more fruits for your labour.
Garden tip: If you control your growing environment, you can take a cutting from a plant to propagate at any time of year.
Busy Shops
Like many gardeners, our shops have been busy growing a range of plants in various propagators. We’ve been starting seeds off for displays as well as taking cuttings for propagation, cloning existing plants.
This blog post will show how to take a cutting from a plant and how aeroponic propagation works.
Read on to see what we’ve been up to and learn how to take a cutting from a plant. Then, if you’re interested in trying it for yourself, give propagating cuttings a go and clone your own favourite plants.
Jade Plant
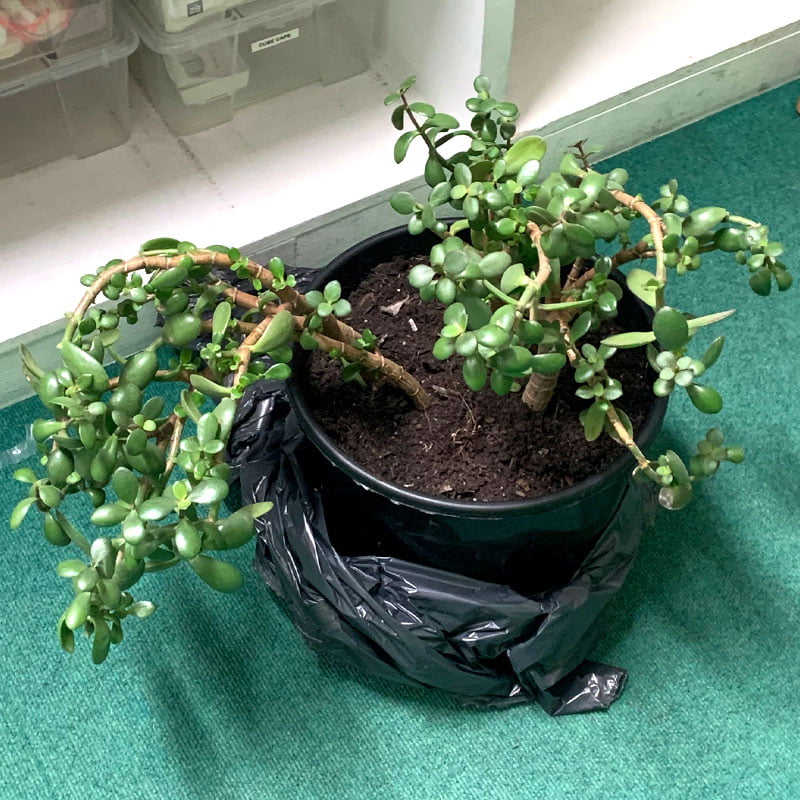
Our Chelmsford shop manager, Cameron (Cam) brought in a much-loved family Jade plant (aka Money Tree). The Jade is a popular succulent variety and is a great choice to learn how to take a cutting from a plant. He wanted to use it to propagate some new plants. We’d never tried aeroponic propagation with Jade before. So Cam set about configuring one of our 40-site X-Stream Aeroponic propagators.
How To Take a Cutting from a plant for Propagation
Keep Your Tools Clean
When you take cuttings It’s never a bad idea to use clean, sterile tools, such as a sterile scalpel. Keeping things sterile helps to avoid introducing any problems and disease.
Preparing Cuttings for Aeroponic Propagation
Cam prepared 40 cuttings to fit the aeroponic propagator.
Choose how to take a cutting from a plant by selecting suitable shoots with 2 or 3 nodes and cutting below a node.
When you remove the cuttings, cut the cut end again, this time at a 45-degree angle with a sharp, sterile scalpel. Clean cuts at a 45-degree angle give the maximum area of exposure.
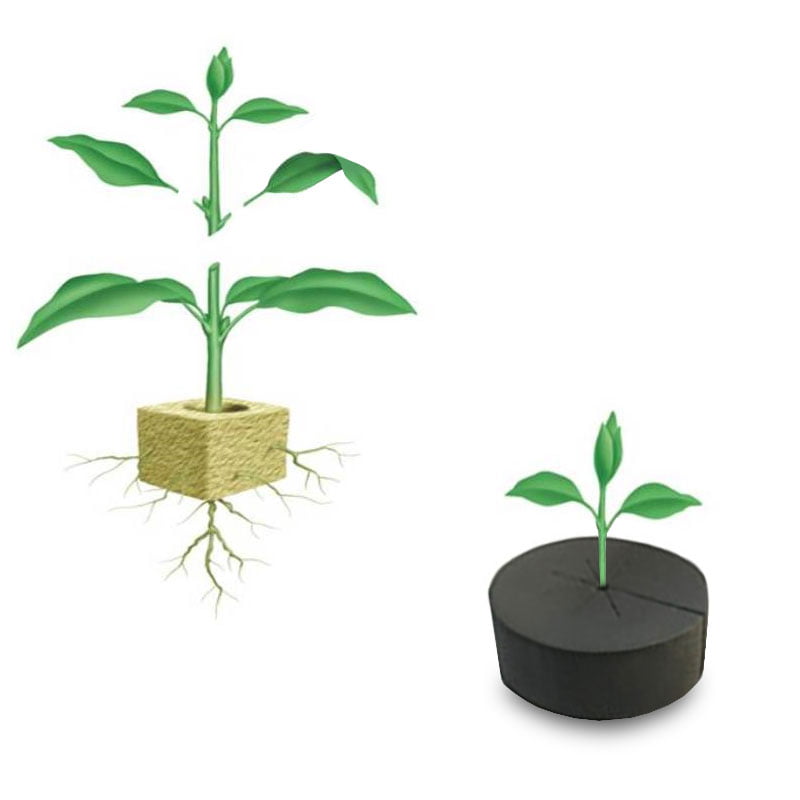
What even is a node?
As the below illustration shows, a node is the point on the plant’s main stem where the leaf stalks (petiolule) and axillary buds appear. New roots will appear around the cut node.
Garden tip: If you want to find out more about Aeroponics, we wrote all about Aeroponic systems here.
Propagating Cuttings
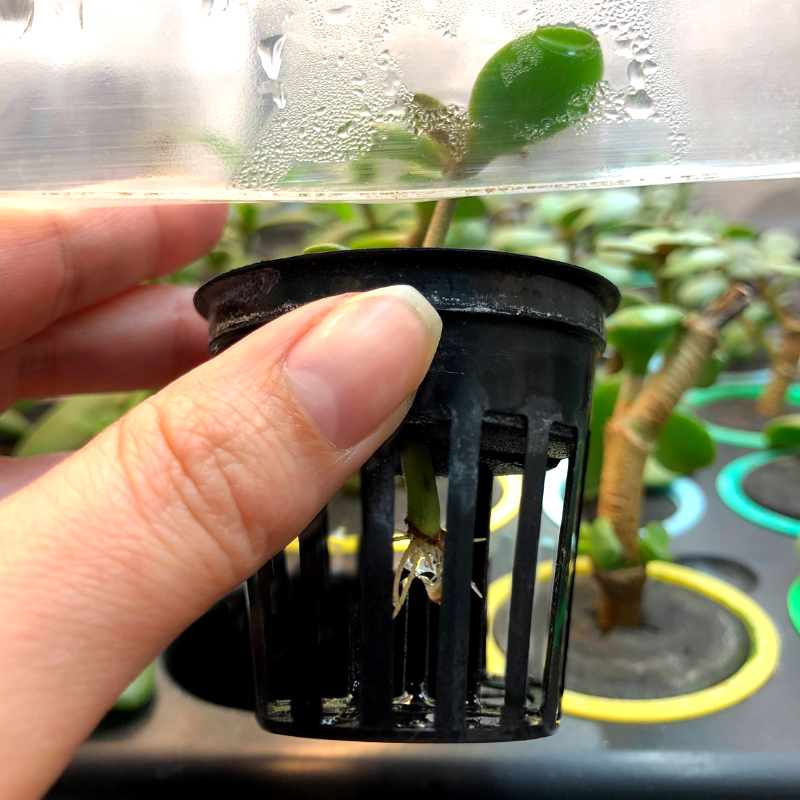
Once the cuttings were ready for the propagator, Cam loaded them into net pots and secured them using neoprene collars (discs).
The propagator reservoir was filled with freshly filtered water and a 4 ml/l solution of GrowDog Rugged Roots root stimulator. Finally the lid was secured to allow the humidity to ramp up.
The propagator went into a propagation tent with T5 propagation lights and was left running at around 21C. The aeroponic propagators ability to maintain perfect rooting conditions with a mix of air and a fine mist of water rapidly encourages new roots to bud. When new roots do bud, using GrowDog Rugged Roots, root stimulator, works to rapidly accelerate new root growth.
Lower transpiration to speed up rooting
Successful Aeroponic propagation needs constant access to water and oxygen at the node. It also needs you to keep transpiration low.
Maintaining a steady temperature helps to lower transpiration rates for the cuttings. This allows them to put all their energy into root production.
There are products available to help limit transpiration, such as BioBizz Leaf Coat. Leaf coat forms a sealing layer that allows air and light in, but stops the internal transpiration process. This allows your cuttings to concentrate on producing roots and allows you to run at slightly warmer temperatures with increased humidity.
Daily care
To provide perfect conditions for rapid rooting, it is generally considered best practice to control the internal reservoir temperature between 18-22C. You also want a high humidity level in the upper chamber, around the tops of the cuttings.
Ready in less than a week with high strike rate
Back to the Jade cuttings, now we’ve told you how to take a cutting from a plant, you’ll need to keep a close eye on them.
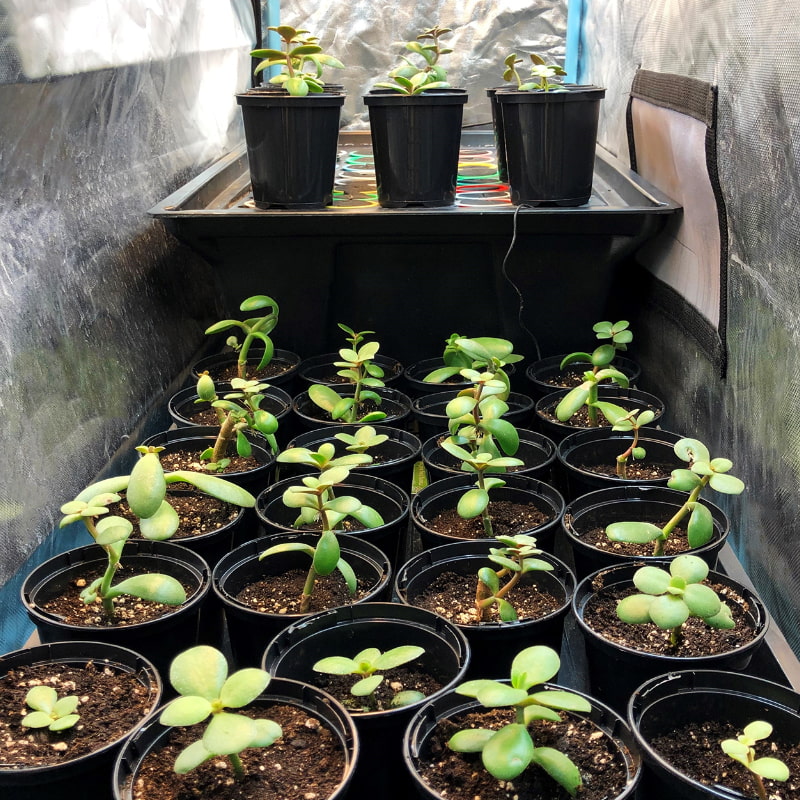
Cam and the team monitored all 40 of the cuttings and saw their rapid root development. Each of the succulent, Jade, cuttings had healthy, white shoots within days. They were ready for potting on in 6 days. This is around the average time seen with our experimentation with Aeroponic propagation.
With increasing 100% success rates, paired with rapid rooting, Aeroponic propagation is fast becoming our preferred process for propagation.
Following the propagation and cultivation of a healthy root system, you can pot up your new plants and grow them on in your favourite potting medium. Here, we used GrowDog Soil and Perlite mix.
Don’t miss out in your own gardening. Learning how to take a cutting from a plant is a simple process, and it works most of the time. Doing it well will bring astounding success rates. Get involved today.
Other Popular Propagation Methods
Taking Chilli plant cuttings in Jiffy Pellets
We have also had success with our range of in-house Chilli plants. We use the same methods for taking cuttings, but used the ROOT !T propagator with jiffy pellets.
We put cuttings in a hydrated jiffy pellet and place in the ROOT !T propagator cell tray. We hand water* in this propagator and keep the pellets moist while roots develop. The expanded jiffy pellets keep their shape due to the netting. The netting also helps to ensure the best air/water exchange. Propagating cuttings this way, is more involved and takes more work, but in the end, you get the same results.
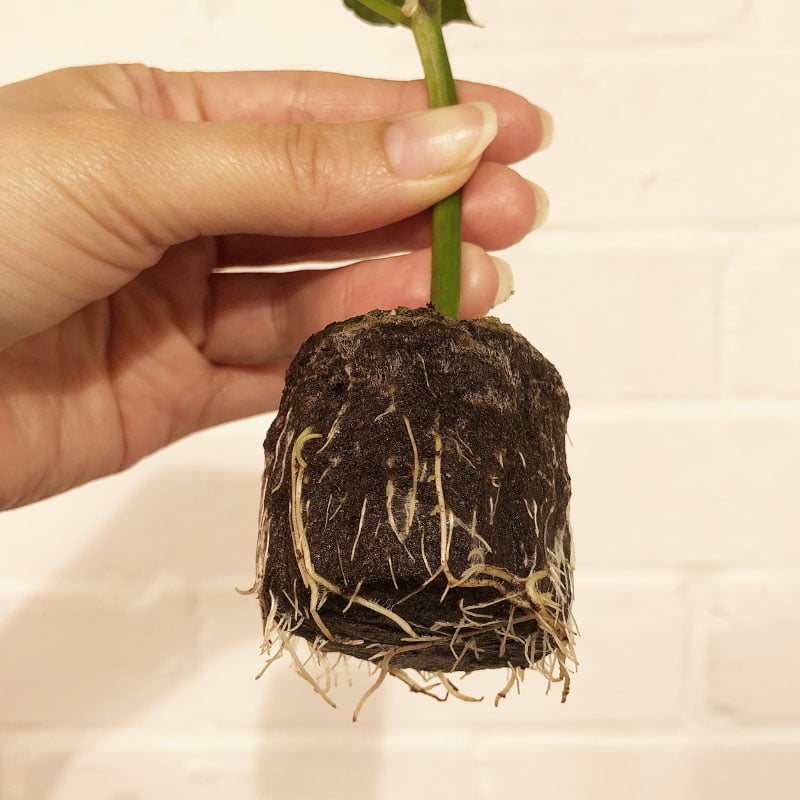
The below images show one of the successful Chilli plant cuttings ready for growing on.
As you can see, the healthy, white roots are looking vigorous and ready to take off as soon as they go to the next stage, in any number of growing systems that we run in our shops.

*We recommend using a dilution of filtered water and upto 4 ml per litre of a root stimulator, we use GrowDog Rugged Roots. This helps to maintain humidity levels and really does stimulate rapid and strong root growth.


